MYOG Challenge: Cuben Fiber Pack!

Ploss has been busy figuring out how to spend more money on more, lighter gear – and previously (earlier) whining about how homey don’t play sewing machines. HFY! A real man in need of a cuben fiber backpack should make his own! The only way to get the pack that’s exactly right for YOU is to rock it yourself:

  • This dude made a 2.54 oz. pack complete with a snowshoe pouch!?
  • These peeps will sell you everthing from cuben fiber and noseeum remnants to silnylon, zips and patterns!
  • BPL MYOG’ers are often using tape instead of sewing!

Are you telling me you couldn’t make this yourself? And better? An den?

In other words, I’m throwing down the MYOG gauntlet: why shell out for some hideous green eyesore used kleenex looking made by some other dude item when you can rock your own?! You might even save yourself a few bucks, and an @$$ kicking from the wife 😉

Footnote: we smack, but seriously if you aren’t looking to MYO cuben fiber pack check out zpacks.com: Joe has designed a truly remarkable 4-5 oz. (+/- config) backpack capable of rocking a weeks’ worth of food and UL gear – think about that!  As such  – and after reading the Backpacking Light review (subscription required; PS: get one!) – I must admit I’m thinking about one myself. Odds are you’ll be seeing a Ploss review of a Zpack very soon. A green Zpack. An incredibly light, expertly made, fully functional, hideous neon Hulk-green Zpack. Which will lead me to…get my own or lead the next hike!

Posted in Gear Reviews, Smack | Leave a comment

Proposed Hike: Nick Eaton Ridge via Wy’East, Herman Creek Loop

A new Columbia River Gorge Scenic Area hike was on the agenda – one that would take us up Nick Eaton Ridge to the last area we’ve yet to explore in the vicinity. Historical note: Nick Eaton was a farmer who lived near Wyeth in the early 1900’s, as far as you know. Though this is a four day hike – requiring a few days off to pull off – I think I’ve come up with a good itinerary:

Day Camp Miles
1 Benson Camp via Wy’East 10.6
2 Ridge Camp 14.3
3 Casey Creek Camp 11.9
4 Eagle Creek/Out 11.8
Totals 48.6

This “loop” starts and ends at familiar Eagle Creek, and includes new waypoints including the Wy’East trail 434, the Nick Eaton Ridge trails 437 and 437, a reverse traverse of the Herman Creek trail, and a descent back down the PCT to the junction of Ruckel Creek and ultimately the Eagle Creek campground.

Indian Point on the Nick Eaton Trail

Day One: Eagle Creek to Benson Camp, 10.6 miles

We get started with the 6 mile section up Eagle Creek to the first bridge and the Wy’East spur: a 3 mile ascent that bypasses the greater Wahtum Lake area, terminating at Camp Smokey – just under 2 miles from old reliable, Benson Camp.

Day Two: Benson Camp to Ridge Camp, 14.3 miles

This section begins along the PCT, making that long descent to Herman Camp where we join up with Trail 437: the upper Nick Eaton Ridge Trail. Along the way we’ll pass Indian Point, Deadwood Camp, gain a shiteload of elevation (nearly 5000′ this day) concluding at Ridge Camp that sports a nearby water source.

Day Three: Ridge Camp to Casey Creek Camp, 11.9 miles

From here we’ll ascend Green Point Mountain, joining up with the Herman Creek Trail at the intersection of the Nick Eaton, Herman Creek and Pacific Crest Trails – not far from old favorite Magellan waypoint, the Tomlike Mountain trail. From here we’ll descend to Cedar Swamp, pass a half dozen large and small falls, fill up with plenty of water at Hazel Creek and rack at spacious Casey Creek camp. No death-defying trip down trail 407 required!

Day Four: Casey Creek Camp to Eagle Creek, 11.8 miles

We’ll finish out the Herman Creek Trail for about 2.5 miles, and just past Herman Camp we’ll hit the PCT – Trail 2000. It’s just a bunch of switchbacks from here, a long 9 mile descent to the junction of Ruckel Creek trail and the half mile road to Eagle Creek campground.

Footnote: it was tough to find a 3 day version of this hike with logical camps; I will however update this to include a truly gruesome 2 day version that would be a true fastpack battle test!

And…here we go.

Day Camp Miles
1 Deadwood Camp 22.3
2 Eagle Creek/Out 26.3
Totals 48.6

Alternately (again) you could go 24.9 on Day 1 to Ridge Camp and have a mere 23.7 miles out…I suppose that would be the proverbial game-time decision. It’s possible…not unlike the Timberline to Eagle Creek 2 day feel we discussed last year…but would be grim. Tempting? But grim!

Posted in Columbia River Gorge | Leave a comment

New Gear: GoLite Virga Jacket

New gear arrived today. Kali Ma!

Ah, ebay. Never thought I'd buy gear from ebay!?

High on my gear wish list was a light rain jacket: I had good waterproof/breathable pants, a nice windshirt, the ultimate poncho – even chaps! – but when the weather required something less than my freaking heavy full Gore-Tex North Face parka, I was hosed. After doing a little homework and discovering a jacket good enough for my man Skurka I settled on the GoLite Virga.

Spanking new with tags from ebay: 40 clams!

Turns out the Virga is a discontinued model, although as of today you can still find some sizes and colors available on sale directly from GoLite. Having recently rediscovered ebay, I thought I’d see what I could find and was pleasantly surprised to find what I was looking for, new, at such a great price. It’s definitely worth a look when shopping for a retail item such as this.

Get to the point. What’s it weigh?! Immediately, of course, I threw the thing on my Feedback Sports scale and it weighed in at 8.5 oz – not bad for an XL! I definitely could have rocked a large; it’s a bit roomy, but leaving space for insulating layers was part of my strategy. As luck would have it, it started pouring moments after I opened my item so I of course ran outside to see how wet I would get. I didn’t! Success!

Full zip with hood, zip pockets; no pit vents unfortunately.

Details: the Virga is made with “2.5 Layer Waterproof-Breathable Nylon Ripstop Fabric with DWR” which is to say GoLite’s proprietary Alchemyâ„¢ fabric. I must have read a few dozen reviews of this jacket, along with a dozen more each from a dozen other similar jackets, and they all read pretty much like every tent review I’ve ever read as well: waaa! Not breathable!! Waaa!! Too much condensation!! Eventually I suppose everyone figures out that if it’s raining, and you’re exerting yourself, and you’re sweating…there’s moisture on the outside, and moisture on the inside…and the thing works about as well as is possible. It ain’t going to be perfect. That said I may regret not having pit zip vents, but my guess is that I can micromanage sweat issues with a climate-appropriate base layer.

Review: I’m hoping to venture up Ruckel Creek Trail either tomorrow or Thursday afternoon, and The Last American Virga will be in full effect. As Ruckel provides a…challenging workout, and the forecast is for rain/snow and a freezing level near 2000′ a few hours up and down the thing should provide a baseline standard for the breathability of the GoLite Virga jacket in worst-case conditions.

Update: my Ruckel hike is rescheduled for Tuesday 1/26 on what looks to be a dry day; given the deluge that greeted me this morning, I headed out for a quick 3 miler on the Wildwood/Markham trails in a total downpour. I was pleased with the breathability I have to say – on this morning’s hike as well as on a dry 6 mile hike two days ago, where I wore the Virga as more of a windshirt in 45° AM temps – and it certainly kept me dry. That said I was keeping a breakneck pace and sweat quite a lot, and was thus wet in and out. The difference was my body temperature, which was very comfortable.

I also took advantage of today’s conditions to field test my MLD chaps at the same time, and was VERY pleased with how they worked over my usual REI Sahara Convertible pants. The chaps were very comfortable – I forgot I was wearing them, frankly – and kept my pants dry despite the soaker. I did wear a GoLite visor under the Virga hood which did a superior job of keeping rain off my grill. Good kit 🙂

Posted in Gear Reviews | Tagged , , , | 3 Comments

REI Arete ASL 2 Tent Review

My gear wish list was pretty short heading into the end of 2009, and was made up primarily of  mountaineering and winter items –  while I’m very happy with my UL kit I was ill prepared to extend my backpacking into the Fourth Season for much of anything other than a day hike. Courtesy of a serious Kali Ma! massive REI gift card Christmas tightener from my Pop-In-Law, I was able to acquire (among many other items) an REI Arete ASL 2 “all season” tent. Here’s what REI has to say about it:

There are two very good things to say about this tent right off the bat: it’s relatively light for a “4 season” tent at 5.2 – 5.8 lbs. depending upon configuration, and it’s dirt cheap in comparison to the competition. You can spend, well, all of your money on a hard core mountaineering tent and this bad boy set me back exactly $170 – a price point that just about anyone can live with, especially given the options available to use this year-round if one were so inclined. Given that I’m a die-hard Gatewood Cape/bivy sack user for 99% of my backpacking needs, the kind of January weather currently available is really where, er when, this tent will be useful for me.

Note: the Arete 2 Footprint, sold separately for about $15 at a weight of about 10.2 oz. (my scale, sans carrying bag) does push the maximum weight to about 6 lbs. and was included in this review.

Testing: take this review with a grain of salt from a conditions perspective – this was NOT a true field test, and the intent (heh) of this review is to demonstrate the features and provide a general overview of usage.

Conditions: 35° with strong wind gusts (30-40 mph) and periodic heavy overnight rain in the ol’ smackyard – that is to say, NOT in the field; not in/on snow/ice.

Setup: Another feather in the Arete’s cap is the ease of setup; I set this up solo, first time, pretty cold, gusty wind while taking photos in about 12 minutes – guessing I could reduce that to well under 10 and 2 motivated people could get it up in about 5 minutes I would bet.

The Arete 2 Footprint clips very easily to the tent's corners

Laid out and ready for the 3 poles

Two shockcorded orange poles go into the corner sleeves; the third aluminum pole has a horizontal sleeve near the door

Free standing, ready to clip footprint and attach fly

Rainfly clips attach directly to tent corners at six connections

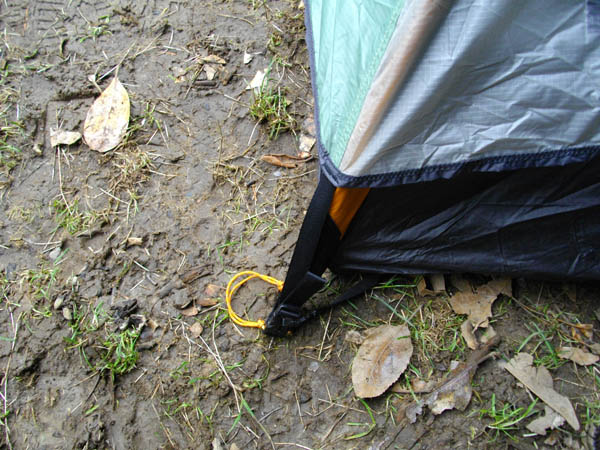
Fly and Footprint corner attachments as simple as any I've seen; ready for stakes

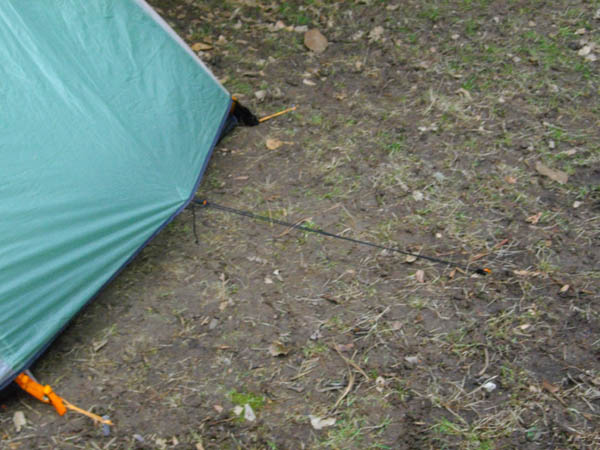
Extra guylines included; in heavy wind staked out sides (required 2 extra stakes, only 8 included)

Staked, with open vestibule. Wind gusts to 35 mph during this shot

Interior sufficiently sized for two, especially with UL gear. Narrow, but with generous headroom

Small vestibule; sufficient for boots, cooking but little else. Nice flexible wire door brim/overhang

Top vents work extremely well; optional pole provides fantastic breeze-through stability

Clear 'window' a great vestibule feature. Total setup time 12 minutes!

Overnight Testing: overnight temps dropped to 34° with a heavy .25″ of rain, winds up to 40 mph (per my Oregon Scientific Weather Station inside the house). Sleep system: Marmot Arroyo 30° sleeping bag; Therm-a-Rest NeoAir pad (L). Slept like a baby 🙂 I vented the top vents only slightly, about halfway, and experienced zero condensation. Zero. In fact the entire interior of the tent was completely dry when I brought it inside after taking down. The wind noise was pretty severe in the trees surrounding me but the tent never so much as shuddered – very, very stable.

Conclusions: given the cost and weight, my first impression was outstanding and I’m highly optimistic that the Arete ASL 2 will become a regular fourth season shelter for me in serious weather. Clearly, I need to test this in snow but having snow camped in other 3 season domes and legitimate 4-season tents, I am confident the Arete will hold its own. Will it hold a foot of snow? I’ll get back to you on that one! Until then, this tent is recommended.

Pros:

  • Low cost
  • ~6 lbs: f’n heavy by normal UL backpacking standards, but perfectly acceptable for weekend snowshoeing/mountaineering, especially if the carry weight can be divided between two peeps (tent + fly and poles)
  • Good stability!
  • Good ventilation! (My experience in this instance only; others have had complaints, be sure to read the REI reviews)
  • Quick, easy setup
  • Nice features including vestibule window, easy pole sleeves and clips, nice light aluminum stakes (will be replacing with titanium stakes, natch), several interior mesh pockets, ceiling loops, and plenty of guyline loops for added stability in wind/snow

Cons:

  • Could be a bit cramped for two if forced to wait out a storm etc.
  • Limited/no internal or vestibule space for gear
  • Heavier than a bivy sack/tarp rig – but you were expecting that!
  • May or may not meet mountaineering (bombproof) requirements
  • Door and vestibule door a bit finicky
  • Limited useful configurations

UPDATE: I had an opportunity finally to field test the Arete ASL 2 in early March, and was overall quite pleased with how it performed in winter conditions. Camping at 4100′ on about 1 foot of  packed snow, 27 degrees, light wind the Arete ASL 2 was an excellent single person shelter, albeit at a significant weight penalty for a solo tent. Highly motivated assembly took about 7 minutes with mitts in failing light; the instructions suggest leaving the fly attached (dry) for quick pitching, and I thought I’d give that a go by attaching the fly at home in advance. Bad call. Any time saved by having the fly attached ahead was completely negated by the extra effort required to insert and attach the poles/clips, and I highly recommend that you simply attach the fly separately each time you pitch. Other observations:

  • Zero condensation. Zero. I did use the short fly vent pole on the ceiling, and vented the top vents only to about 3 inches on each side as I was very, very cold by the time I was ready to get in my bag. Very happy with the ventilation.
  • Very easy to pitch under less than ideal conditions, with gloves. Not windy enough to require extra guylines on the sides, yet breezy enough to take note that the Arete ASL barely moved – even simply loosely staked into the snow.
  • Takes down quickly and easily
  • Ample interior pockets – plenty of stow space for two
  • Sufficient space for two, would be cramped for extended periods
  • Reasonable vestibule area, adequate for cooking, boots, small pack. Fairly easy to get out of the main tent and stand through the open vestibule w/o undue contortion as can happen with some vestibule designs.

Posted in Gear Reviews | Tagged , , , | 7 Comments

Wahtum Lake – Herman Creek Loop

Earlier, Ploss and I salvaged what remained of what was to be a truly awesome spectacle: one week on the trail. One work fail and one quadriceps fail later, Ploss was most fortunately able to work a solo expedition to Olympic National Forest, followed by this hike – the 33 mile Wahtum Lake – Herman Creek Loop – to complete an 80+ mile week. Not bad 🙂

WAHTUM LAKE – HERMAN CREEK LOOP VIA PCT, HERMAN CREEK TRAIL
DISTANCE: 32.2 MILES (AS DESCRIBED) | SCENERY: 7 | DIFFICULTY: 6

Local area of Columbia River Scenic Area/Mark O. Hatfield Wilderness

  1. Trailhead: Wahtum Lake Campground
  2. Camp 1: Benson Camp
  3. Camp 2: Casey Creek Camp

Day One: Wahtum Lake to Benson Camp. September 17, 2009. 11.3 miles (with side trips to Chinidere Mtn. and Ruckel Creek)

The day began with an interesting Google Maps FAIL, providing us with an opportunity to explore some of the greater Hood River area private forest lands, do a little offroading, and spend some QT with Giant Tractor Guy in the middle of freaking nowhere. Ultimately we acquired good directions at a local Gas n’ Sip and made our way to the Wahtum Lake Campground parking lot. From here, Trail 406B, the “Anthill Trail” (a) makes its way around the east si-eed of Wahtum Lake, gaining about 700′ along a periodically exposed, narrow trail, crossing Trail 409, terminating at Trail 406. You’ll be back here, later. From here you can take a right for a side trip up Tomlike Mountain (h) (which the author has yet to actually find visit), otherwise head left on Trail 406 for 0.8 miles to the junction of Trail 2000 – the Pacific Crest Trail. Note: this section is typically totally dry until you reach Benson Camp. Carry enough water to cover Day 1.

Above Wahtum Lake from Anthill Trail

This section includes a remarkable area of old growth trees stretching as far as the eye can see, and snow can linger in this shaded area well into summer. McLovin’s photos of this area are inferior to Ploss’ and I will ping dude to get some shots worthy of this amazing dense forest grove.

Not far from here you’ll see a sign indicating a side trail up and to the right leading to Chinidere Mountain (b) – a  1.25 mile (total) side trip which should not be missed, especially on a clear day! [side note: a few hundred feet short of the Chinidere trail, to your left, is a shortcut spur to Wahtum Lake; if ascending from Eagle Creek you can bypass the entire area east of Wahtum Lake via this trail). At 4673′ Chinidere Mountain provides spectacular 360° views of Wahtum Lake, the Columbia River gorge, Mount Hood, Mount Adams, Mount Rainier, Mount St. Helens, and the entire surrounding Scenic Area and National Forest. Best place for lunch McLovin has ever been!

Mount Hood as seen from Chinidere Mountain summit

Ploss getting his lunch on. Be alert for a healthy, aggressive local yellowjacket population

Head back down, take a right and continue on the PCT through a meandering 4+ miles that alternate between thick forest and open vistas until you reach Camp Smokey – a worthy camp if it’s vacant, and if it’s late. Water can sometimes be found a half mile down from Camp Smokey, but you should not count on it. From here you’ll journey through more old growth as you reach the plateau summit, and will find many small meadows scattered throughout the breezy, open forest cap. Just a bit further lay Benson Camp which has a decent adjacent water source, as well as reliable Ruckel Creek a mere mile further.

Benson Camp, ~4000'

Benson Camp isn’t particularly scenic, but there are two very large campsites on either side of the small creek that separates it (essentially the headwaters of Ruckel Creek). On two occasions this creek provided ample water; most recently, not so much. Journey forward about .70 miles to Ruckel Creek proper for reliable water. At night you’ll hear both owls and trains from opposite distant directions, as the Columbia River Gorge lay relatively close down Ruckel Ridge below. [Note: take some time to explore the various spurs (c) surrounding Benson Camp – trails 405, 405a, 405b and 405c – for excellent summit views and silent, magnificent old growth]. Sleep system: BPL Pro 90 Quilt; Therm-a-Rest NeoAir pad; Ptarmigan Bivy; SMD Gatewood Cape. Can’t endorse any highly enough but if you’re forced to pick only one, get the Gatewood Cape. Twice.

Day Two: Benson Camp to Casey Creek Camp. September 18, 2009. 12.4 miles (with side trip to Herman Creek @ Casey Creek Camp)

We left the familiar comfort of Benson Camp and headed towards the junction of Ruckel Creek trail, near Hunter’s Camp –  another possible and often occupied camp at the summit of Ruckel Creek Trail and a good spot for water. H2O is really of NO concern today, especially after you reach the Herman Creek Trail itself, but the next 6 miles after the Hunter’s Camp junction will be  mostly dry, so fill up! Continue on Trail 405B until you rejoin Trail 2000 (Pacific Crest Trail) and head left/down/NE towards the Columbia River. This section is a long, steep descent – from 4000′ to about 500′ – over about 6.5 miles, and you’ll have epic views of the Columbia River Gorge below at several intervals along the way (d). Enjoy!

Switchbacks begin, with views of Mt. Adams (Mt. Hood off camera) and Herman Creek tributaries (also off camera. As are other things!...)

Down below, you’ll have various views of the many smaller creeks that feed Herman Creek that you’ll pass over the next day, cutting through the landscape. Stop periodically for twenty and look up – the view behind is money too!

Crowns overhead from the way you've come

Eventually you’ll reach the bottom and find yourself at the Herman Creek Trail junction – less than a half mile from the Herman Creek bridge and an excellent water source. Fill up as you want, there’s plenty of water en route to Casey Creek. More on that later.

Herman Creek Bridge

If you see Indian Point...you've taken the Nick Eaton trail. D'oh!

There’s only about 3 miles to go from here, and it’s a slow, gradual climb that includes some truly magnificent waterfalls.  Fill up to your heart’s desire – you’ll thank me later!

These 100' falls will provide you with endless photo bounty

This section levels off when the forest gets dense, and ultimately you’ll find the spacious, not particularly scenic Casey Creek Camp. Casey? Casey Creek? Where did you go? Yeah…Casey Creek itself is essentially dry and the nearest good source on Trail 406, Hazel Creek, is exactly 1 mile away. D’oh! If you didn’t fill up enough along the way, you’ll want to head .70 miles down trail 407 (e) (from the rear of the camp itself) to East Fork Herman Creek. Straight down. Think coal mine shaft, with a death-defying rappel at the bottom. It beats the 2 mile round trip to Hazel Creek, maybe? but just barely. Try to plan ahead! Sleep beneath Casey Creek camp’s giant widowmakers and enjoy the peaceful sounds of rushing water below.

Day Three: Casey Creek Camp to Wahtum Lake. September 19, 2009. 8.5 miles

Several more falls await you as you begin this last day on Herman Creek trail. Plenty of water early on. Stock up as you like until you reach Whiskey Creek (f) which represents the last reliable water of the day. This section starts out very mellow, with a gradual climb through a few waterfalls, twists and turns above the East Fork of Herman Creek, immersed in lush forest.

Now entering rainforest

It’s a short 3.5 mile hop from Casey Creek to aptly named Cedar Swamp Camp – you’d prefer not to camp here. Not only is this whole section incredibly damp, with abundant signs that it’s predominantly so year-round, but signs of a recent, significant local fire abound. In other words, keep moving. You’ve climbed about 1300′ at this point, and this camp really marks the end of a generally mellow section. Not far past Cedar Swamp is a last good source of water for the last 4 miles of the day.

From here you begin your ascent back up to Wahtum Lake, which begins gradually through a thick, bushwacking few miles of overgrown brush (g). Unfortunately for us, we reached this point right when it started to rain. Pour. The wet overgrowth served as a car wash-like soaker, and given our relative proximity to Wahtum (and the car) we pushed through w/o stopping to put on rain gear.  This was as wet as McLovin has ever been on trail, but we made excellent time motoring up to the 4000′ “summit” near the Mud Lake spur. Here the trail grade lessens slightly, and for the next mile we mostly just wondered if we were in fact summiting Tomlike Mountain. We were not. This was however where we discovered that McLovin’s fabled Road To Nowhere (circa 2008) was in fact within a whisker of the Tomlike Mountain trail (h) – just not littered w/pink and orange ribbons and impossible to pass. Impassible.

Soon you’ll reach the familiar junction of the Herman Creek Trail 406 and Trail 406B – the Anthill Trail. Make your 700′ gradual ascent and equivalent descent to the Wahtum Lake Campground parking lot over the next 2.2 miles and call it a day. We were totally soaked, fairly beat, and willing to help a group who misjudged the distance from the Eagle Creek trailhead to Wahtum by providing a ride for one back to Hood River to meet his wife and get their group a lift out. All in all this was a scenic, moderate 3 day loop that I’ll definitely want to rock again.

Posted in Columbia River Gorge | Tagged , , | 4 Comments

smackpacker II: electric bugaloo

Welcome to the new smackpacker…we’ll be back shortly following our previous EPIC FAIL…

Posted in Junk Drawer | Leave a comment